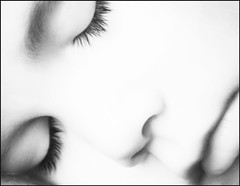
The next thing that I want to talk about is again not something that is difficult to do. It's simply this: Move closer to your subject.
I'm not really sure why this is, but beginner photographers often have a tendency to include lots of unnecessary space around their subjects. Now, it is true that there are times when it is a good idea to have the subject (e.g. a person) quite small in the picture. However, more often than not, the reason someone has left extra space around their subject is that they haven't really thought about making it larger.
So, for your lesson this time, I want you to practice taking photos where the subject completely fills the frame. Zoom in or move closer so that there is nothing in your picture except the subject itself. Here's some examples of the kind of thing that I mean:
Try this with a variety of different kinds of subjects if you can, and don't limit yourself to just one shot of each subject - experiment with trying to fill the picture with your subject if different ways. If it's a person, for example, try different angles, or take photos of the person's hands or feet (rather than just their face), etc.
Once you've done that, take another set of photos where the subject doesn't completely fill the frame, but does almost fill the frame. Something like this, maybe:
Again, you may like to save your favourites from these exercises in your lesson folder so that you can refer back to them later.
The main thing, in all of this, is to try to get yourself used to thinking about filling the picture with your subject. Get used to asking yourself how large your subject should be. That way, if you do decide do make your subject smaller in the frame, you will have done it intentionally - not just because you didn't think about whether it should be bigger.
Have fun, and see you next time for Lesson 4 :)


No comments:
Post a Comment