Last time, in lesson 3, we talked about moving closer. A large part of why that often leads to better photos, is that it helps to make sure that there are no distractions in the picture. If you move closer, you are much less likely to have all sorts of other things competing for attention with the main subject of the photo. The photo is much less likely to look all cluttered and untidy.
So, this time, think about that general principle. "How can I stop this picture from looking cluttered and untidy?"
There are, actually, many ways of doing that. But I want to concentrate on one other specific approach that is frequently helpful (and possible!) -- find a nice, uncluttered background.
When you take a photo, think about what's going on around and behind your subject. If there are lots of different things going on in those areas, then they will be likely to distract people from your main subject. So try to find a way of positioning your subject and/or yourself so that the background is as plain and uncluttered as possible.
The easiest way to do this is to find an area of your surroundings that is relatively plain and undistracting. A nice, plain wall, for example, is often a good choice. But it also may be something less obvious than a plain wall. Look at this picture - it taken at the London Aquarium where there's not really a lot of excess space (or plain walls), but I still managed to frame the picture so that there was only blue water in the background - thereby eliminating distractions:
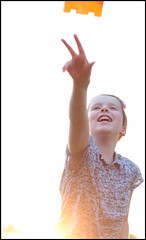
If there isn't anything around you that offers a suitable background, what about above or below you? Many times you can use the floor or ceiling/sky as a background - and potentially get the added benefit of an unusual viewpoint as well. Here's some examples of where I've used those approaches:
Ok - now it's your turn. Try to take a bunch of photos with nice clean backgrounds. Find a wall; shoot from low down with the sky as a background; shoot from high up with the floor as a backbround; and so on. If necessary, consider moving things that are getting in the way. Or think about making your own background with a bed-sheet (neatly ironed!) or some paper/card. That approach is particularly useful when photographing small objects like flowers, etc. where this is more practical to achieve - setting up your own background for a full length portrait of a person can be rather challenging, but it's usually not too difficult to prop a piece of card behing a flower you are trying to photograph.
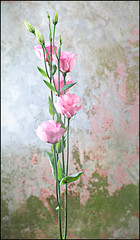
Remember too that the background doesn't necessarily have to be completely plain. Sometimes a background with a bit of a pattern or texture can also work well. Like this one, for example:
As usual save the best ones in your course folder before you move on to Lesson 5.


No comments:
Post a Comment