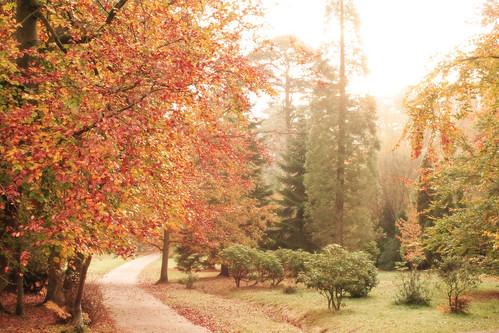
This is another of the photos from my dawn excursion to the local park with my sister.
The version you see above is the final image after post-processing - the remainder of this post shows the original photo out of the camera and brief details of the post-processing that I used to get to the final version.
Here is the original version from the camera (Canon 350D; Sigma 24-70 f2.8 lens; ISO100; f22; 1s; manual exposure and focus modes):
With the post-processing, I was aiming to enhance the warm, glowy feeling - the process was, as always, rather iterative, but the final details were as follows:
- "Developed" the RAW image in DPP with the following settings:
- Exposure: +0.5
- White Balance: Shade (to give it the warm colour cost)
- Pic style: landscape
- Saturation: -2
- Sharpness: 2 (my usual setting)
- Converted to Jpeg and imported into Photoshop (I have version 7, so can't edit RAW files directly in Photoshop)
- Created 3 duplicates of the background (giving four in total):
- A sharpened layer (just above the background layer) with mode set to luminosity (to avoid those colour fringes that you tend to get when you sharped images like this one)
- Above that, a slightly blurred layer with opacity of 50% (normal mode)
- Above that, another, more strongly blurred layer with mode set to Soft Light and opacity of 73%.
- Finally I used a Hue/Saturation layer to slightly adjust the overall hue (Master Hue set to -7) to give a slightly redder overall colour cast - I also used a layer mask to slightly fade off the hue adjustment to some of the greener areas in the lower right area of the image.


No comments:
Post a Comment